

We take you through the smart card-Bitlocker setup process, step-by-step
Date: 2021-03-18
Author: Chin Jien “C-J” Lau, Technical Consultant
Previous << Versasec logs best year yet

Data theft remains one of the greatest challenges and threats for many corporations during the time of COVID-19 With the growing number of mobile workers worldwide, the threats of data theft from lost and stolen laptops or other devices is becoming more prevalent. That is why the Microsoft Windows 10 operating system comes together with a nifty feature that addresses these threats: It is known as BitLocker Drive Encryption. BitLocker protects data by providing encryption for entire volumes. Such security can be further enhanced by using smart cards or smart tokens to encrypt data on the computer using BitLocker. That means that if the drive or volume needs to be decrypted, the smart card/token used to perform the drive encryption earlier will need to be readily available before the decryption process can proceed.
Using BitLocker with SmartCards
This blog describes the simple, step-by-step process of issuing smart cards or tokens using vSEC:CMS, and then using BitLocker with those cards/tokens. To get started, issue a smart card/token to a user using vSEC:CMS and activate the card/token.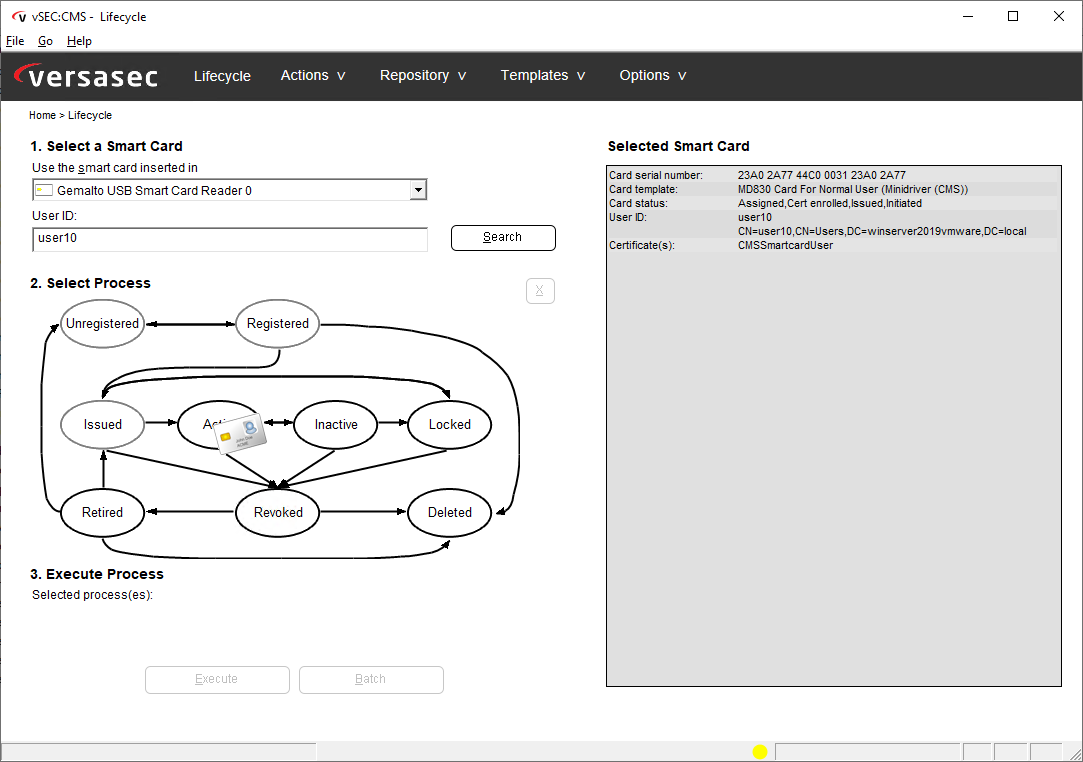
Next, bring the smart card/token to any client workstation and login to the workstation with the vSEC:CMS-issued smart card/token.
Using BitLocker with Smart Card
1. At the Windows 10 Client Operating System, launch “regedit”. Under “ComputerHKEY_LOCAL_MACHINESOFTWAREPoliciesMicrosoftFVE” add the term “SelfSignedCertificates” with the type REG_DWORD and assign the value of “1″. 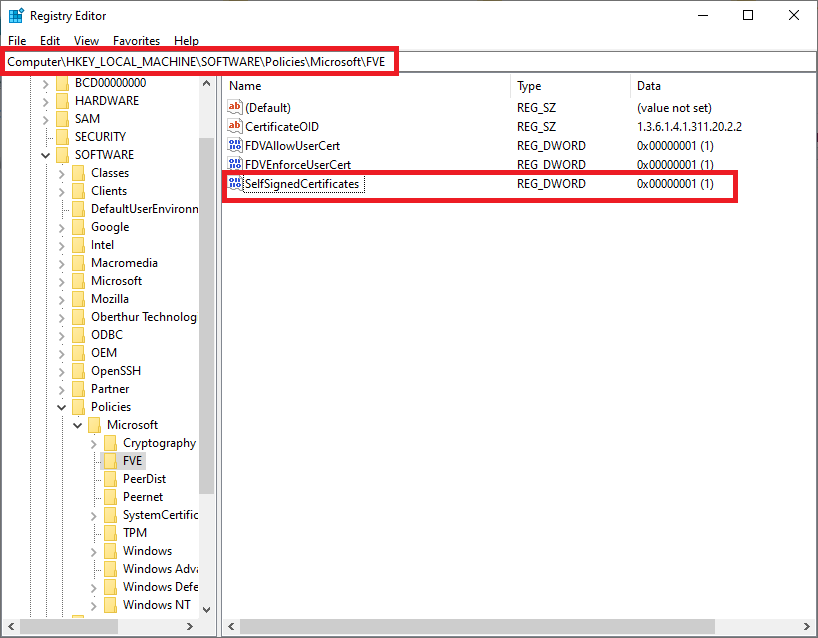
2. Next, launch Control Panel and under the search bar, key in the word “certificates”
3. Click on “Manage file encryption certificates”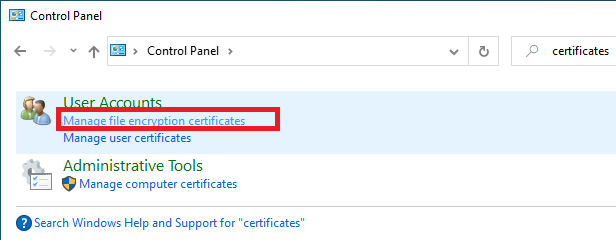
4. Click “Next”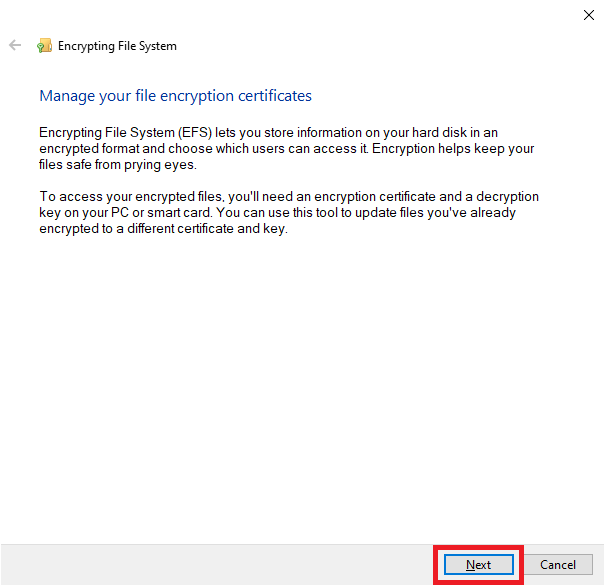
5. Select the radio button “Create new certificate,” and then click “Next”
6. Click “Select certificate”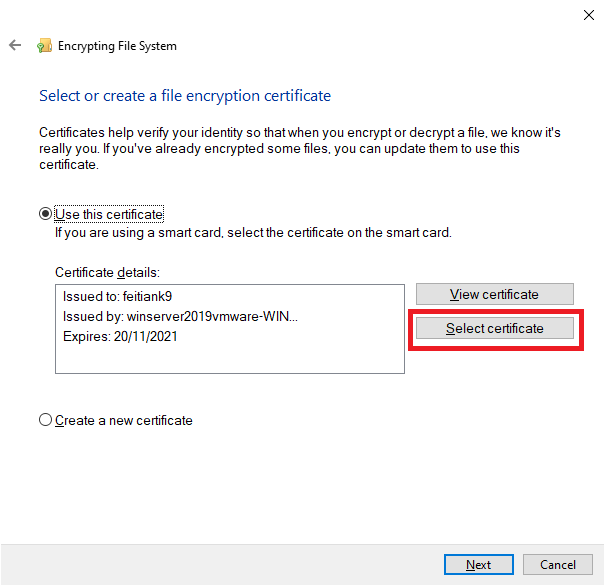
7. Select the certificate from the smart card/token and click “OK”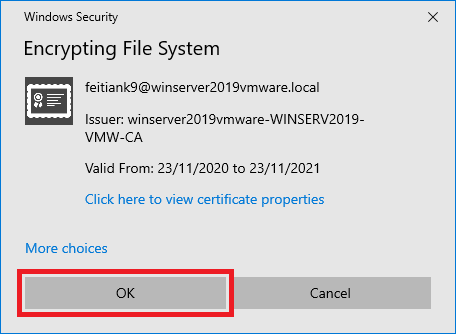
8. Click “Next”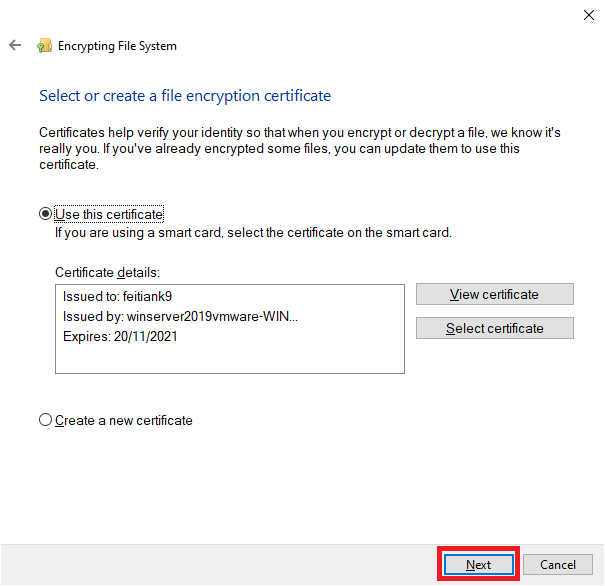
9. Select the desired backup option and then click “Next”
10. Click I’ll update my encrypted files later to use the self-signed certificate only for BitLocker. Make your choice as appropriate, and then click “Next”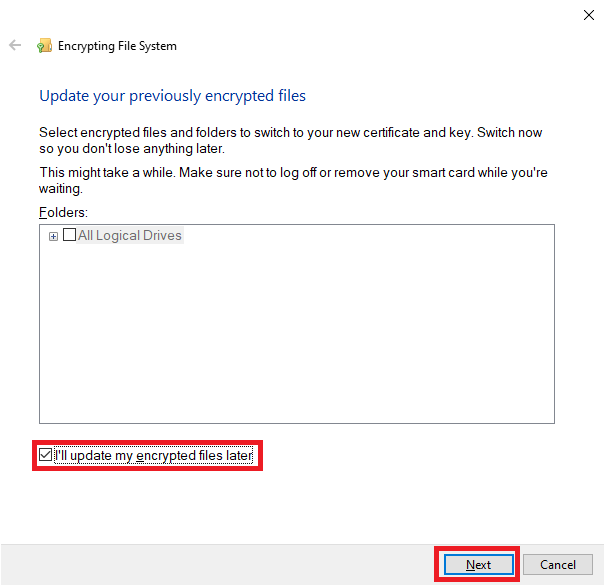
11. Click “Close”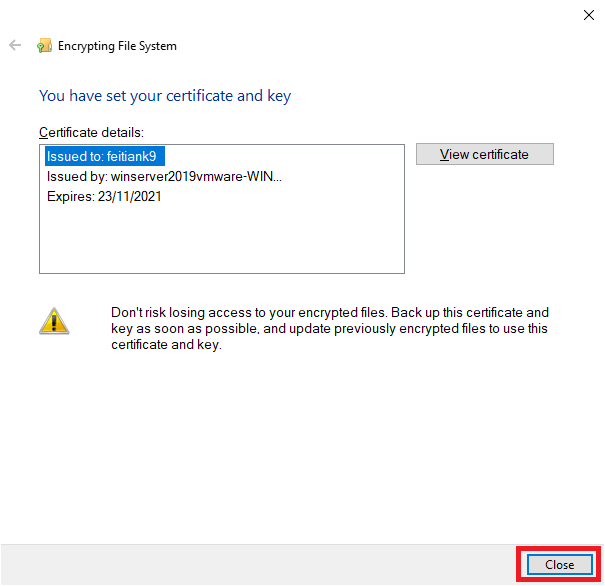
12. In the Search program and files box, type cmd to open the command line interface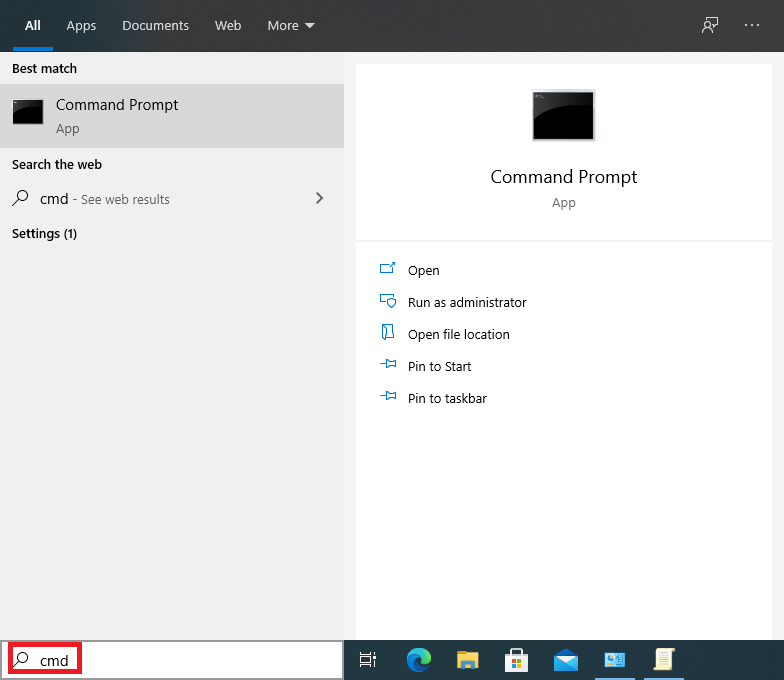
13. Plug in your smart token or smartcard. In the command line issue the command “certutil -scinfo”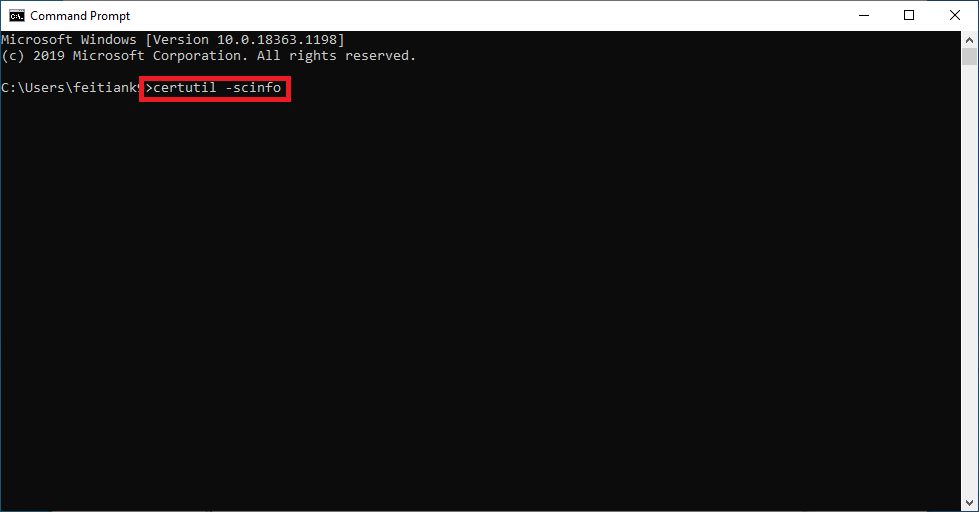
14. Look for the information Application[0] as highlighted below and copy it. This is the object identifier (OID). In this example the information we are looking for is “1.3.6.1.4.1.311.20.2.2″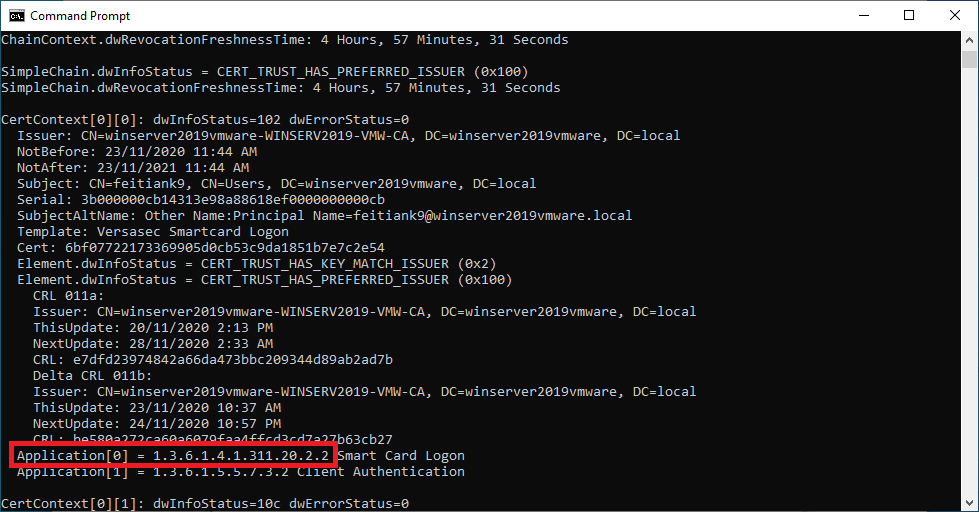
15. Launch the Local Group Policy Editor by typing gpedit.msc in the search bar.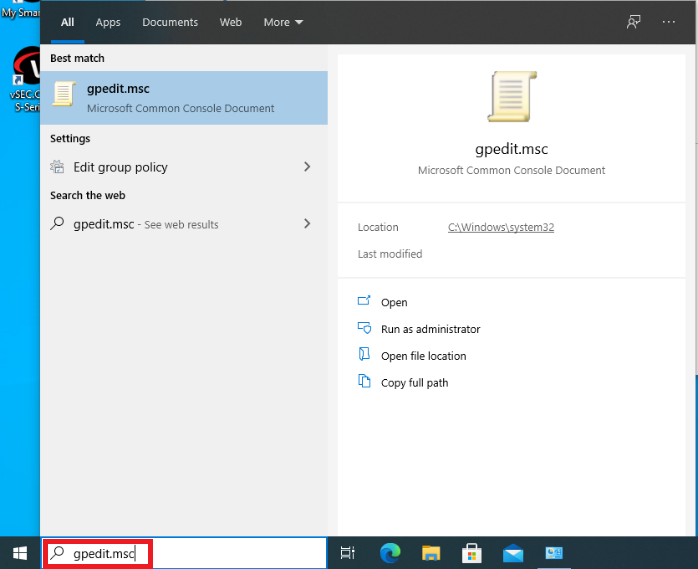
16. Navigate to Computer ConfigurationAdministrative templatesWindows ComponentsBitLocker Drive Encryption, select the setting Validate smart card certificate usage rule compliance.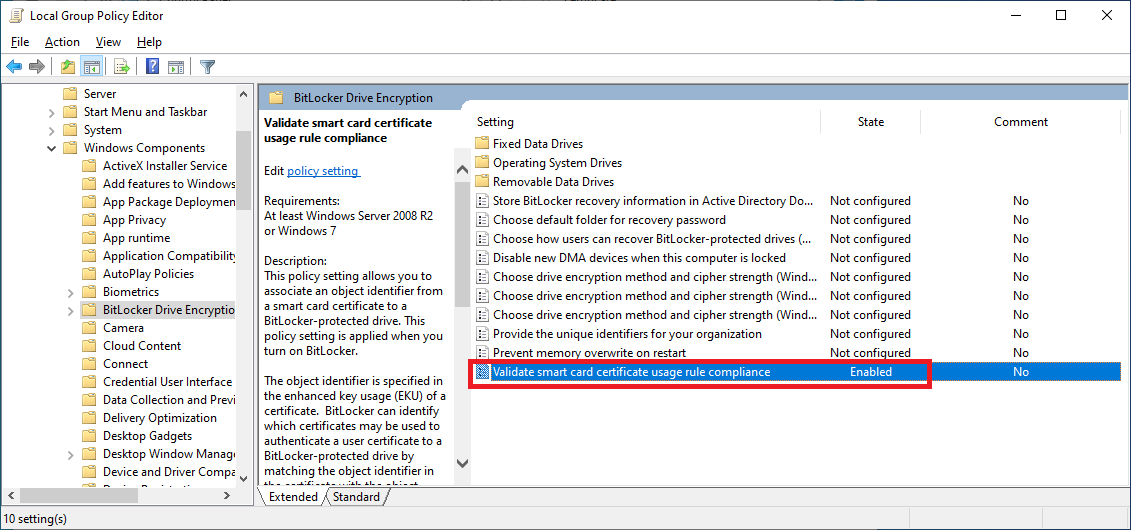
17. Select the radio button “Enable” and key in the Object identifier (OID) setting to match the object identifier of the certificate from the smartcard. Finally click “OK” to apply the settings.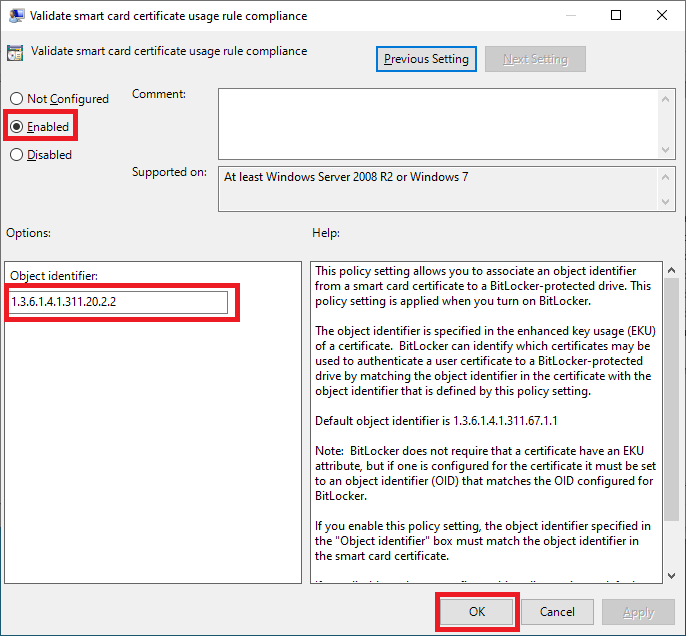
18. In the Search program and files box, type bitlocker and hit “Enter”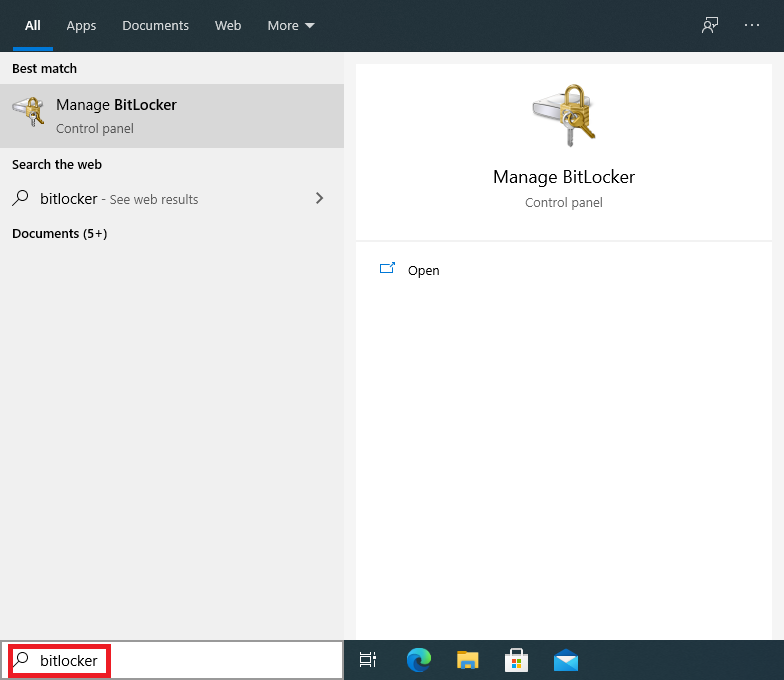
19. Select any volume you intend to switch on BitLocker by clicking at “Turn on Bitlocker”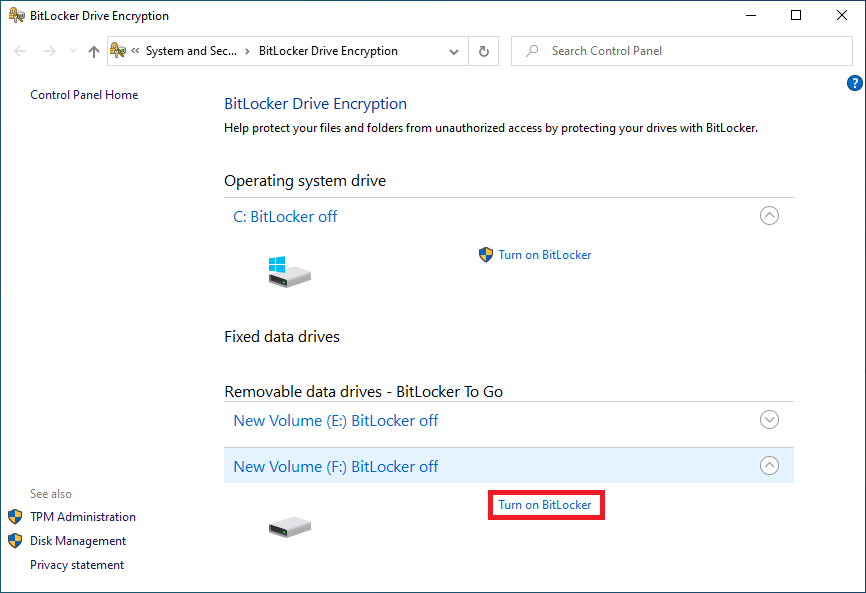
20. Select “Use my smart card to unlock the drive” and click “Next”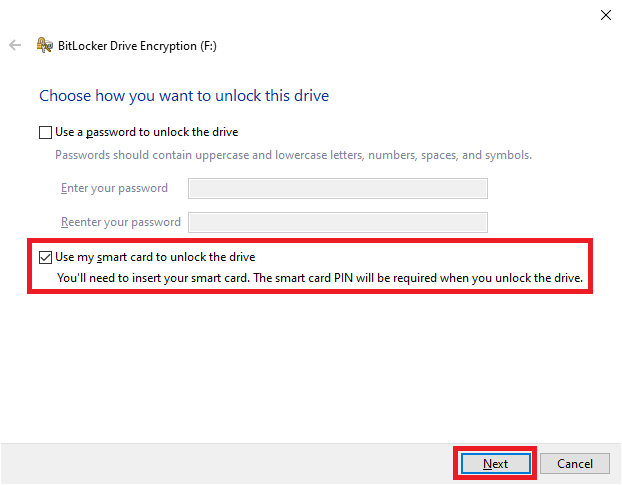
21. Click “Save to a file”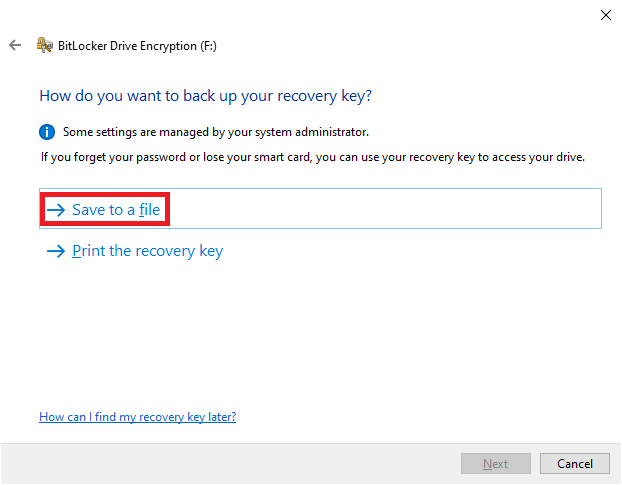
22. Select a location to save your recovery key and click “Save”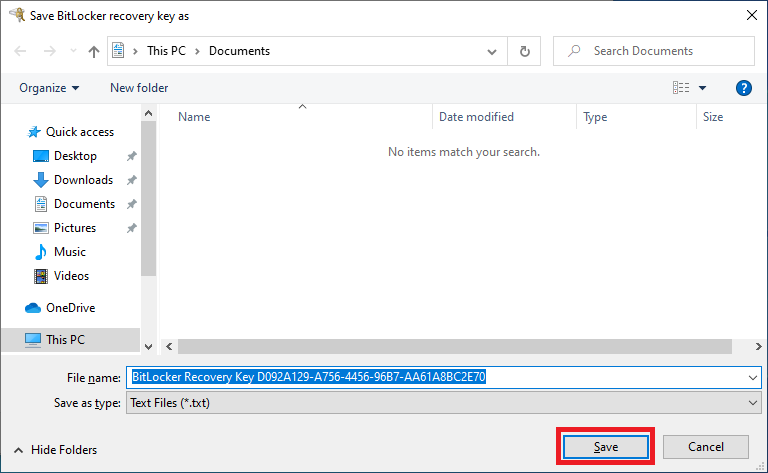
23. Click “Next”
24. Select how much of the drive you’d like to encrypt and then click “Next”
25. Select the encryption mode based on your drive and then click “Next”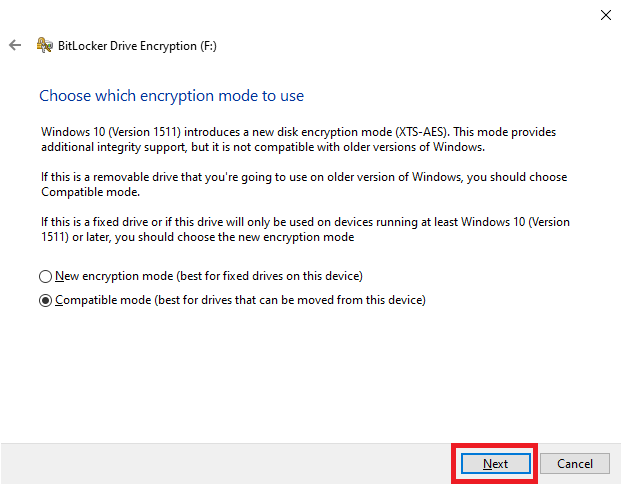
26. Click on “Start encrypting”
27. Once it’s done encrypting the drive, click on “Close”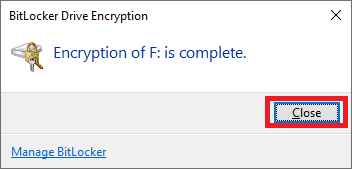
This post was first first published on Versasec Blog’s website by . You can view it by clicking here