

Manage Exchange Online with Ease: Steps and Tips
Administering Exchange Online
Exchange Online offers mailbox management, calendaring, and collaboration features. Exchange Online admins can manage Exchange Online either using the graphical user interface or using Windows PowerShell cmdlets and the command line. In this article, you’ll learn how to manage your environment using the GUI tools.
Administering Exchange Online using the Graphical User Interface
The web interface for Exchange Online is nearly identical to the web-based Microsoft Office 365 Exchange Management Console (EMC) included in the on-premises product since Exchange 2013. While some parts of the Exchange Online EMC are specific to Office 365, you will find that most parts work exactly as you expect — for instance, you can create transport rules, edit recipient settings to add new SMTP addresses and manage user mailboxes.
You must have Office 365 admin permissions to access the Exchange Admin Center.
To open Exchange Admin Center take the following steps:
-
- Log in to portal.office.com using your an admin account.
- Click the waffle item at the top left corner.
- Click the Admin
- In the Office 365 Admin Center, click Admin Centers
- From the resulting Admin Centers pop-out menu, click Exchange.
Alternatively, you can get to the Exchange Admin Center directly by going to the site https://outlook.office365.com/ecp and signing in using your credentials.
This will get you to the Exchange Admin Center dashboard, as shown in Figure 1:
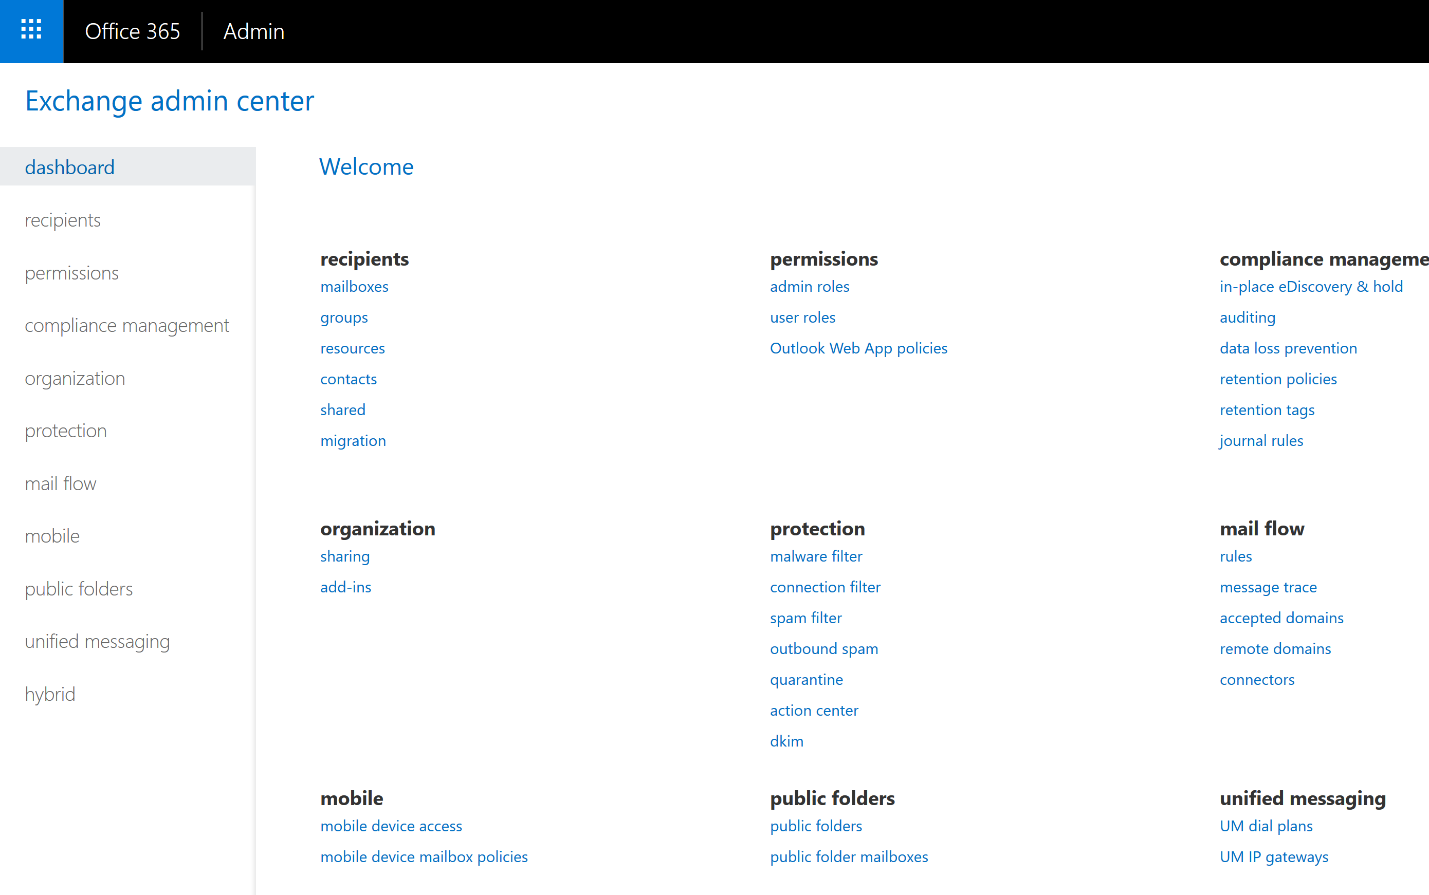
Figure 1. The Exchange admin center dashboard
Creating a Shared Mailbox
Shared mailboxes enable multiple users to access mail, contacts, calendar items and related data stored in a single mailbox. For instance, you might have a Customer Support mailbox associated with the support@yourcompany.com address, which three employees are responsible for monitoring.
To create a shared mailbox:
-
- Go to the Exchange Admin Center.
- On the Dashboard page, under the Recipients link, click Shared.
- Click the + icon, as shown in Figure 2.
- Fill out the resulting form (see Figure 2), specifying the email address for the shared mailbox and which users are allowed to view and send mail on behalf of the mailbox.

Figure 2. Adding a shared mailbox
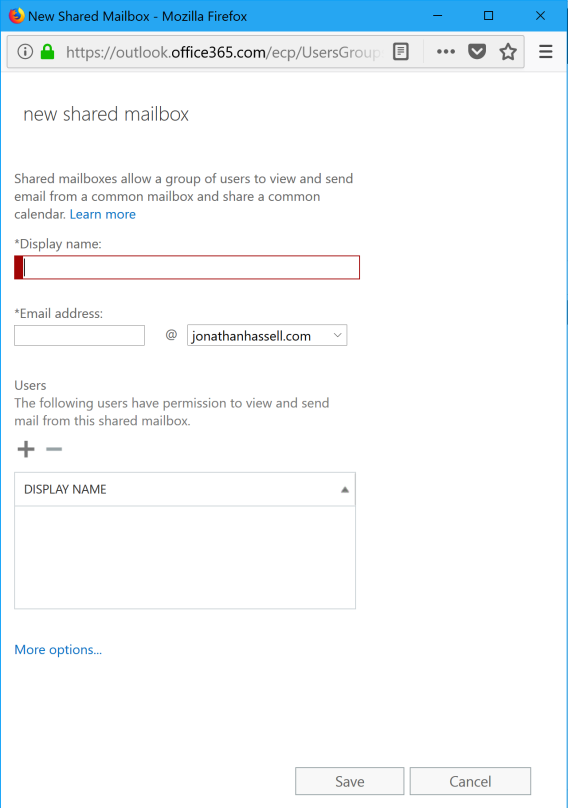
Figure 3. Specifying the details of a shared mailbox
Specifying SMTP Addresses for a Recipient
Most organizations have multiple DNS domains for which they accept inbound email. For example, you might have yourorganization.com, yourorganization.net and so on. In order to get all of your domains working with Office 365, you need to set them up in the service. There is a comprehensive wizard that walks you through identifying your domains, verifying your ownership of those domains, and then setting up the proper DNS records that will get traffic from other internet users to your Office 365 tenant. For that wizard, go to https://admin.microsoft.com/AdminPortal/Home#/Domains and click the Add Domain button.
Once your domains are properly set up on your tenant, you can add the additional email addresses to each user:
-
- In the Exchange Admin Center, go to the Dashboard page and click either Recipients (for an individual user) or Shared (for a shared mailbox).
- On the resulting page, double-click the mailbox you want to modify.
- Select Email address from the options in the left pane of the pop-up menu.
- Click the + icon to add a new email address, and enter the new email address in the next window, as shown in Figure 4.
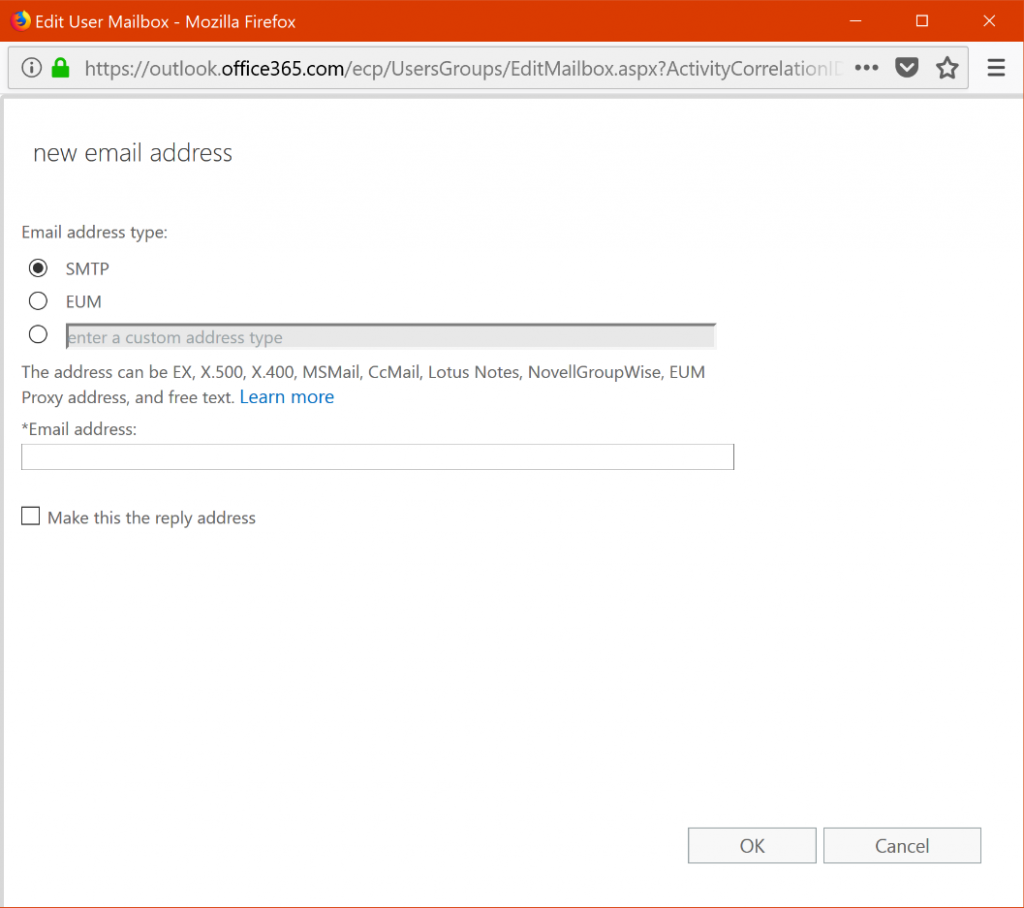
Figure 4. Adding an email address to a mailbox
Granting Send on Behalf and Full Access Permissions for a Mailbox
In many organizations, senior managers have assistants or other staff to help manage their inboxes. In these cases, you need to assign users permissions to access the mailbox and/or send and receive mail on behalf of the user. Here are the steps to take:
-
- In the Exchange Admin Center, go to the Dashboard page and click either Recipients (for an individual user) or Shared (for a shared mailbox).
- On the resulting page, double-click the mailbox you want to modify.
- In the profile, select Mailbox delegation from the options in the left pane of the pop-up menu.
- Click the + button under “Send As” or “Send on Behalf” to add users with those capabilities for the mailbox (see Figure 5).
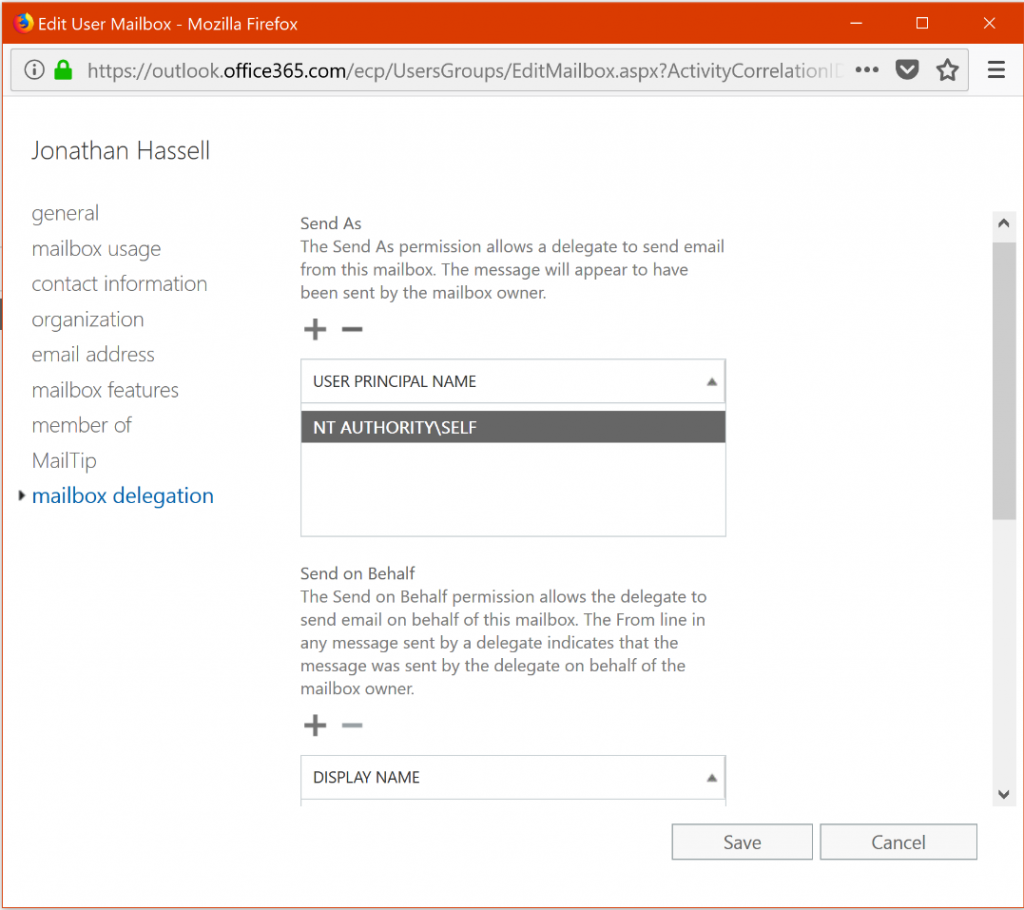
Figure 5. Adding Send As and Send on Behalf permissions to a mailbox
Creating Distribution Lists
A distribution list, sometimes called distribution group, is a single point of contact for a group of users. You might have a distribution list that includes all of a manager’s direct reports, another that includes all employees in a company, and yet another with all users involved in a particular business project. Anyone can send email to the whole group by simply sending it to the distribution list.
Distribution lists are different than Office 365 groups because they function only within the context of email. Groups include a distribution list but also enable other functionality in applications like SharePoint, Microsoft Teams and so on.
To create a distribution list:
-
- In the Exchange Admin Center, go to the Dashboard page and click Groups.
- On the resulting page, in the drop-down menu beside “+ New Office 365 Group,” select Distribution List.
- Fill in the page that pops up, specifying the name of the distribution list and the users to be added to it (see Figure 6).
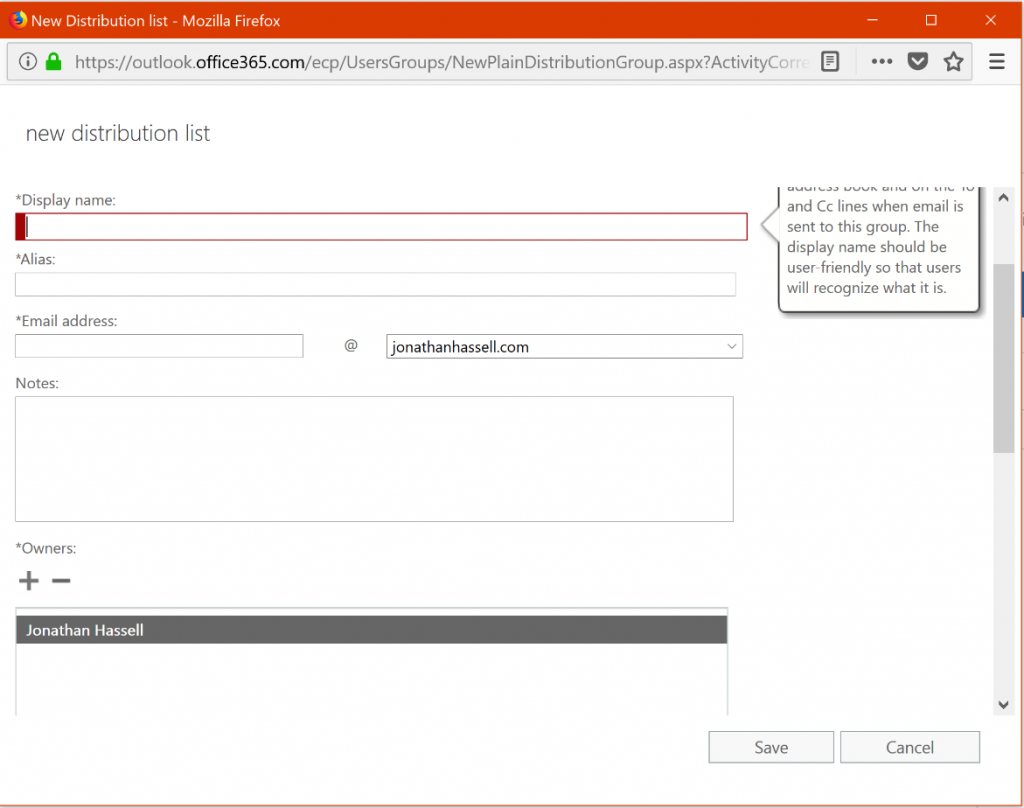
Figure 6: Creating a distribution list
Creating a Mail Flow (Transport) Rule
Mail flow (transport) rules are similar to the Inbox rules in Outlook; you can use them to identify and take action on messages flowing through your Office 365 organization. For example, mail claiming to be from executives and managers is often spoofed, so it can be helpful to identify mail that originated outside of your organization. That way, you can train your users to double-check that messages that ask them to perform sensitive actions (like making a wire transfer or paying an invoice) come from the real user and not some poser outside the company.
Exchange administrators can enforce each rule, or test it, or test and notify the sender.
To create a rule that stamps any message that originates from outside your organization:
-
- In the Exchange Admin Center, go to the Dashboard page. Under “Mail Flow,” click Rules.
- Click the down arrow beside the + sign and choose Modify Messages from the menu. (Here you can see the various types of transport rules you can create.)
- Fill out the resulting pop-up, as shown in Figure 7.
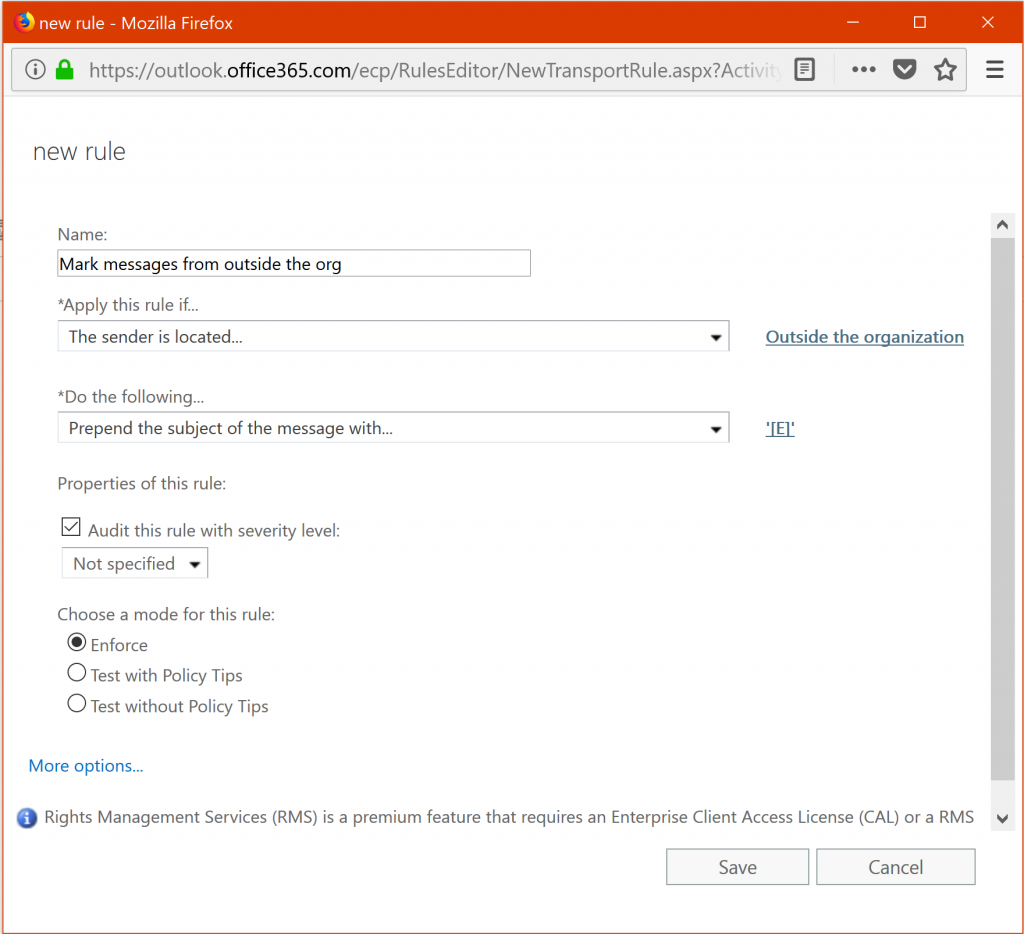
Figure 7. Configuring a rule to mark messages that originate from outside the organization
Blocking Senders
There are a number of reasons, such as spam and user harassment, that users might ask you to block certain outside senders from sending email to your organization. To put folks on a tenant-wide block list, take the following steps:
-
- In the Exchange Admin Center, in the “Mail Flow” section, click Rules.
- Click the + icon and then choose Create a new rule.
- Name the rule, and then click More options.
- Under “Apply this rule if,” choose The Sender.
- Add the email addresses you want to block and then click Check Names to put them on the list.
- Under “Do the following,” choose Block the message and then click Delete the message without notifying anyone to automatically remove the message.
- Click More options, and then for the “Match sender address in message” option, select Header or envelope.
- Click Save to finish.
Enabling Archive Mailboxes
Archive user mailboxes were introduced a couple of versions of Exchange ago to fix problems such as tons of PSTs with old mail lying around in your network. Each mailbox has an archive mailbox attached to it, where older mail can be retained on cheaper storage. That way, older mail is available for eDiscovery, while the size of the primary mailbox is kept under control to improve performance.
To enable an archive mailbox in Office 365:
-
- In the Exchange Admin Center, go to the Dashboard page and click either Recipients (for an individual user) or Shared (for a shared mailbox).
- Select the mailbox for which you want to enable an archive mailbox.
- On the right, under “In-Place Archive,” click Enable, as shown in Figure 8.
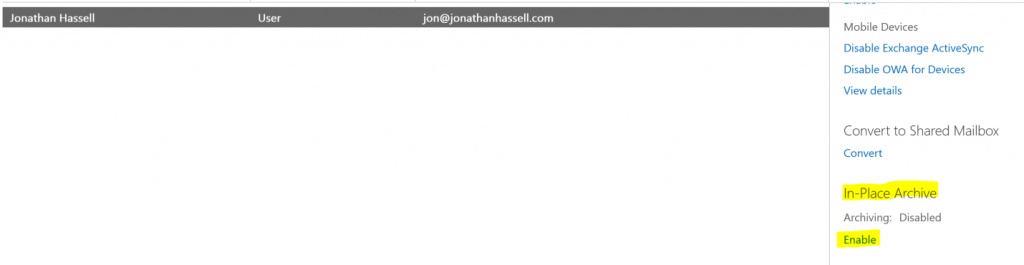
Figure 8. Enabling an archive mailbox for a user or shared mailbox
Conclusions
Do you ever need to know who created a new user mailbox or made changes to a user account’s permissions? Grab our free guide to find out how you can better audit your Exchange Online environment.
Read my previous article to learn how you can add an additional layer of security to your Exchange Online by using a cloud-based mail hygiene solution called Exchange Online Protection. It’s a great tool designed to protect mailboxes hosted in Microsoft Exchange Online against spam and malware.